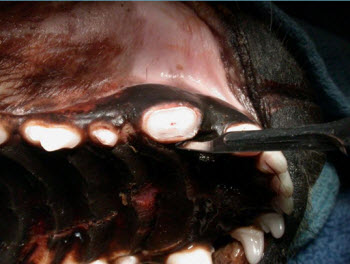
An oronasal fistula (ONF) is a non-healing communication between the oral cavity and the nasal cavity. When the communication is between the oral cavity and maxillary recess (dogs do not have a maxillary sinus), it is termed an oroantral fistula. These defects allow water and food to travel from the oral cavity into the nasal passages, resulting in sneezing, nasal discharge and chronic rhinitis. Causes of ONFs include overly aggressive extraction technique (penetration of extraction instruments through the alveolar bone), severe periodontal disease eroding into the nasal cavity (especially on the palatal aspect of the maxillary canine tooth), buccal (lateral) tipping of the crown of the maxillary canine tooth during extraction (which tips the apex of the root into the nasal cavity), foreign bodies, trauma and neoplasia.
An oronasal fistula is usually located in a non-healed dental alveolus lined with epithelium. Once epithelial tissue lines the fistula, healing will not take place without surgical intervention. Repair of oronasal fistulas is very similar to surgical extraction of these same teeth, with a few refinements in technique that must be adhered to for surgical
success. These are detailed below.
General principles
- The edges of both sides of the closure need to be freshened prior to closure.
- The vertical releasing incisions are made starting wider than the existing defect and diverging apically as they are extended from the edges of the fistula. A broad base ensures a good vascular supply. The angle of divergence is typically around 30 degrees, which is roughly equivalent to a “peace sign” made with your fingers.
- The suture line must be placed over bone. This usually involves some palatal tissue removal from the host side of the suture line, requiring the flap to be wider and longer than initially anticipated. This palatal tissue removal should be done prior to creating the mucogingival flap (Figures 1 and 2).
- After elevating the mucoperiosteal flap, the periosteum on the underside of the base of the flap should be transected to lengthen the flap until the flap lays into its final position with no tension. This is critical.
- Make sure no sharp bony spicules, sequestrae, foreign objects, unattached soft tissue or root fragments are left in or around the alveolus.
- Sutures are placed 2-3 mm apart with 2-3 mm full-thickness bites of tissue on both the donor (flap) and host sides of the suture line. Using identical full-thickness bites on each side of the suture line ensures appropriate edge to edge apposition.
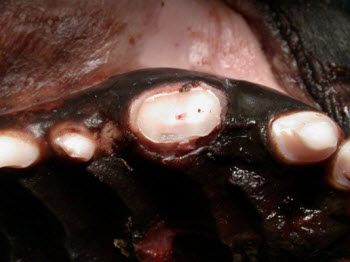
Figure 2. A small crescent-shaped section of palatal soft tissue has been removed. This will ensure that the final suture line will be located over bone rather than over the ONF.
Technique
For the vast majority of ONF repairs, a single mucogingival flap is sufficient. The margins of the fistula are debrided, and a mucogingival flap is elevated with diverging vertical releasing incisions starting at the mesial and distal aspect of the fistula.
The incisions extend apically into the buccal mucosa as far as needed to create a flap of appropriate length. If the initial incisions are found to be too short, they can be extended later as needed. (Figures 3, 4, 5 and 6) The mucogingival flap is completely elevated from the underlying bone with a periosteal elevator (e.g.- Molt 2/4 periosteal elevator) (Figure 7).
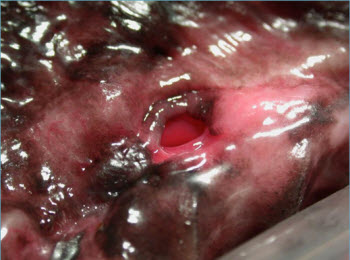
Figure 3. Chronic left-sided ONF.
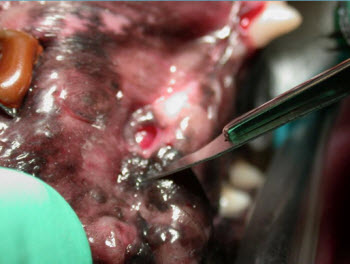
Figure 4. Palatal incision will be made 2-3 mm over the palatal bone.
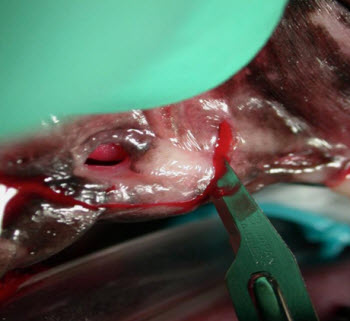
Figure 5. Palatal and vertical incisions are complete.
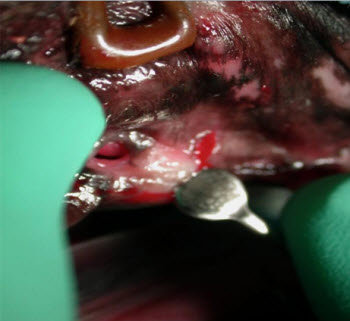
Figure 6. Preparing to elevate the flap, including the preexisting defect.
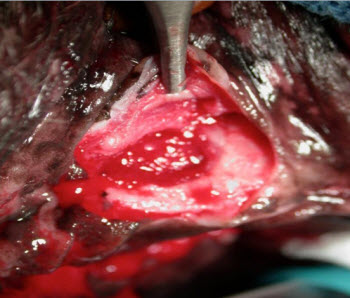
Figure 7. The flap has been elevated. Note the exposure of 2-3 mm of palatal bone. After closure, the suture line will be located over this bone.
The periosteum on the underside of the flap is then transected with either scissors (my preference) or a scalpel blade at the base of the flap, allowing the flap to lengthen to eliminate any tension that might be placed on the flap after closure (figures 8 and 9).
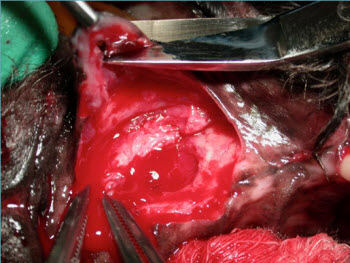
Figure 8. The end of the flap is resected to remove the preexisting defect and freshen the edge.
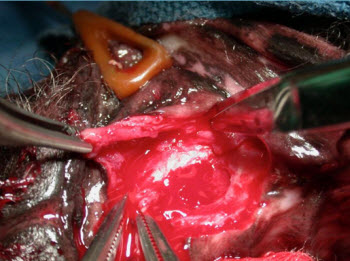
Figure 9. Undermine the base of the flap to lengthen it as needed.
As previously mentioned, the suture line should be placed over bone to protect and support the suture line and help provide a blood supply for healing. Placing the suture line directly over the fistula subjects the sutures to excessive forces when the patient sneezes. To achieve this goal, a crescent-shaped section of palatal soft tissue must usually be removed prior to closure. This requires that the flap be longer to close the defect, but ensures suture placement over bone.
After the edges on both donor and host sites of the suture line are freshened to bleeding tissue, the flap is then sutured into place, fresh edge to fresh edge, with absorbable sutures, placed 2-3 mm apart in a simple interrupted pattern (Figures 10, 11, 12 and 13). Suturing the end of the flap before the vertical incisions helps prevent unintended flap tension.
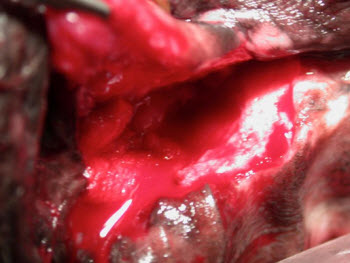
Figure 10. The flap is now ready to close.
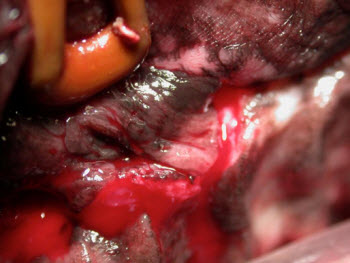
Figure 11. The flap is laid into place prior to closure to ensure that no tension will be present after closure.
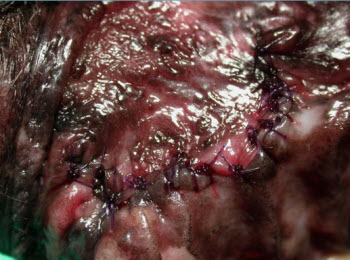
Figure 12. Final picture after closure. Note the edge to edge apposition and suture spacing of 2-3 mm.
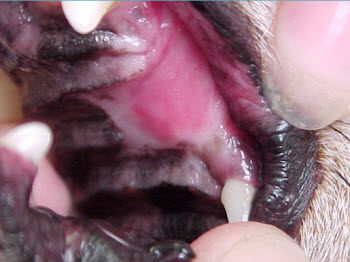
Figure 13. Typical appearance after healing.
For ONF with prior failed surgical attempts, a double flap technique may need to be utilized. This is rare in my experience. With this technique, a mucogingival flap is elevated as above. A second flap is then created from the palatal tissue. Mesial and distal incisions are made in the palatal mucosa and connected at the end of these incisions away from the defect to fashion a rectangular flap. It is very important to accurately measure the distance needed for the flap as the palatal tissue does not stretch. If your flap is too short or narrow, there is no second chance. The full or split-thickness palatal flap is then elevated to the edge of the defect, rotated back over the defect and sutured. This flap will be “hinged” at the edge of the ONF. The lateral mucogingival flap is then sutured over the inverted palatal flap and its donor site. Note that this two layer closure results in a mucosal layer facing both the nasal passages and oral cavity.
Post-operative care includes antibiotics and analgesics. Soft food should be fed and chew toys withheld for 21 days. Patients should also be monitored closely for any pawing at their face, which may compromise the flap.
